1. Create your first Odevio configuration build
If you are here, it means that you managed to install Odevio and have created your account.
You are almost there, this is the only step you need to do to create your first configuration build.
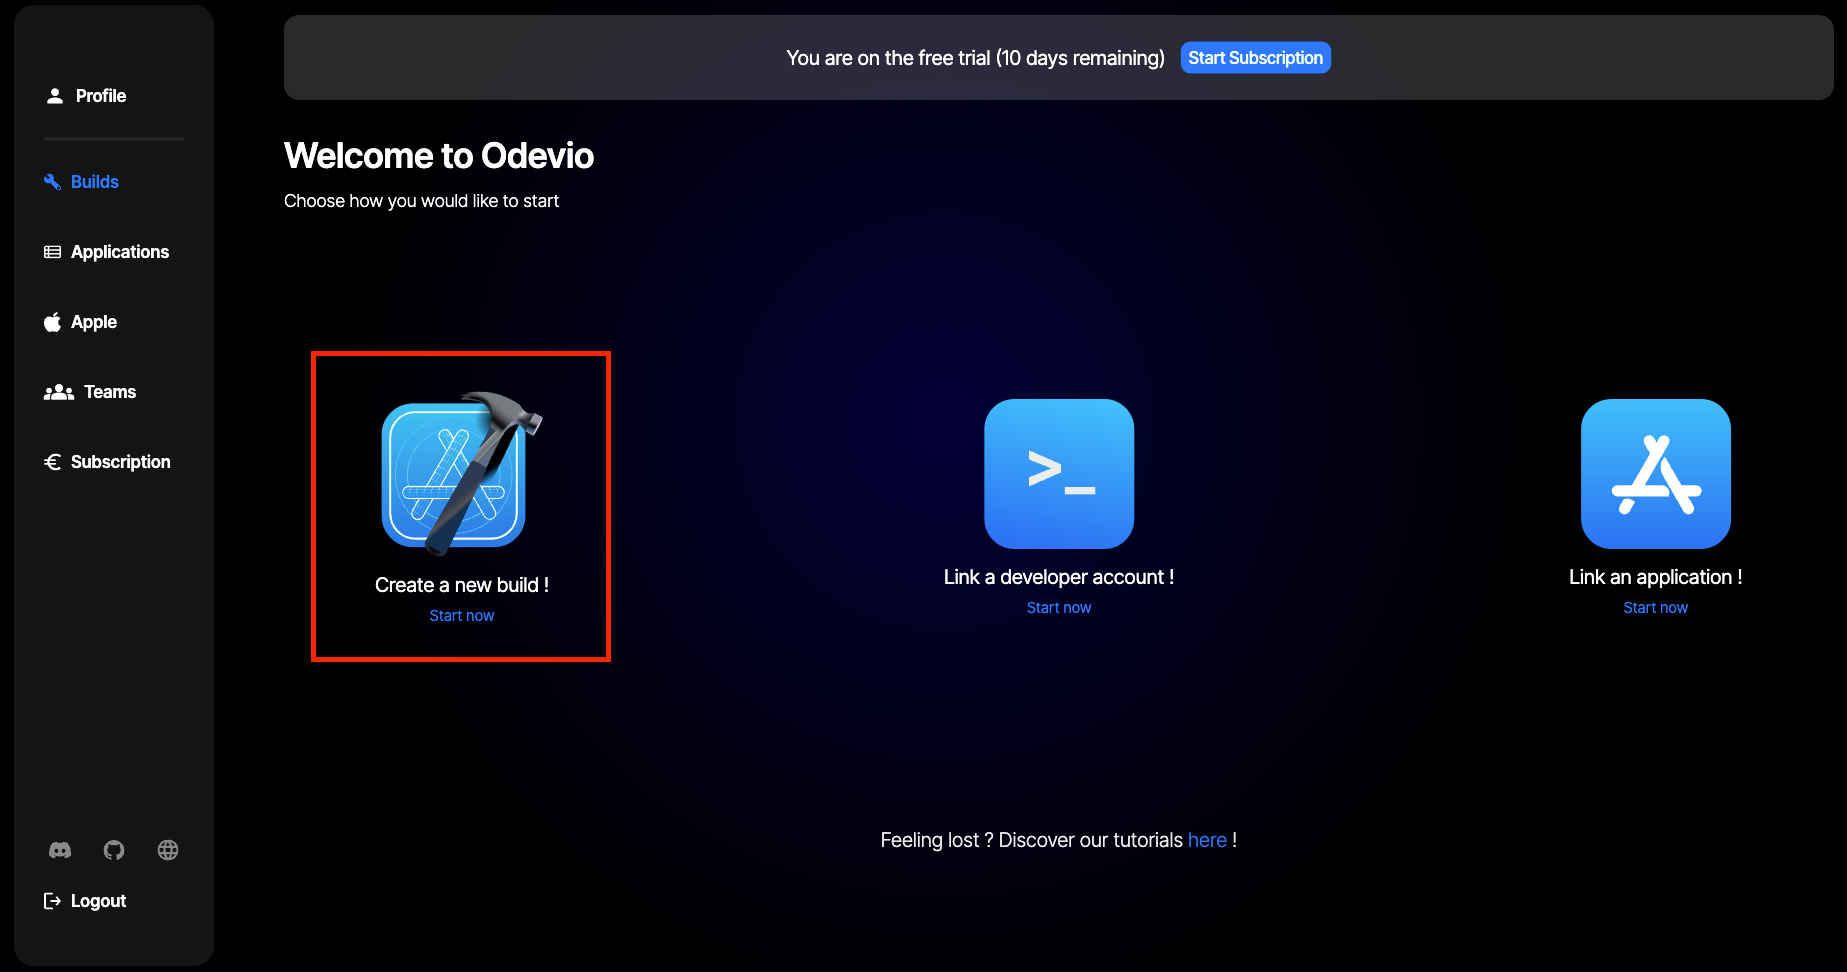
It is really easy, click on Create a new build! or go to the Builds page.
Tip
You can click on the little i’s, it will redirect you to the reference guide and the field’s definition
First, select the root folder of your app! Otherwise, you won’t see any of the other fields of the form.

For this tutorial, you are not required to select an application (Xcode will not be configured).
Note
If you have linked your Odevio account with your Apple Developer Account, you will be able to see a list of the Apps you added.
Select the configuration type
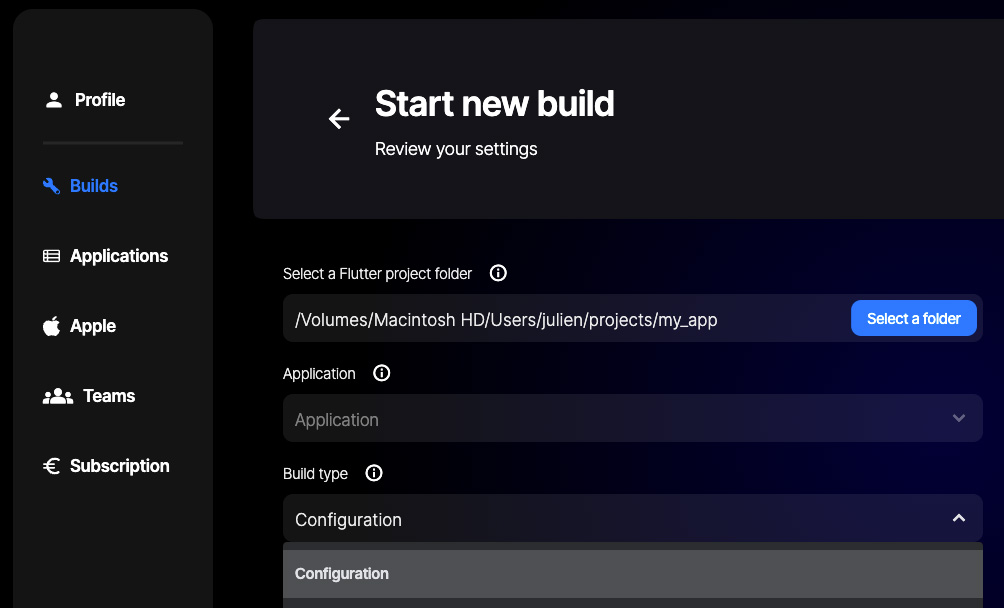
Odevio will detect the Flutter version for you. Make sure it is compatible otherwise you might have some troubles with your build or running your application with Flutter on the VM.
Press tha Start build button whenever you are ready!
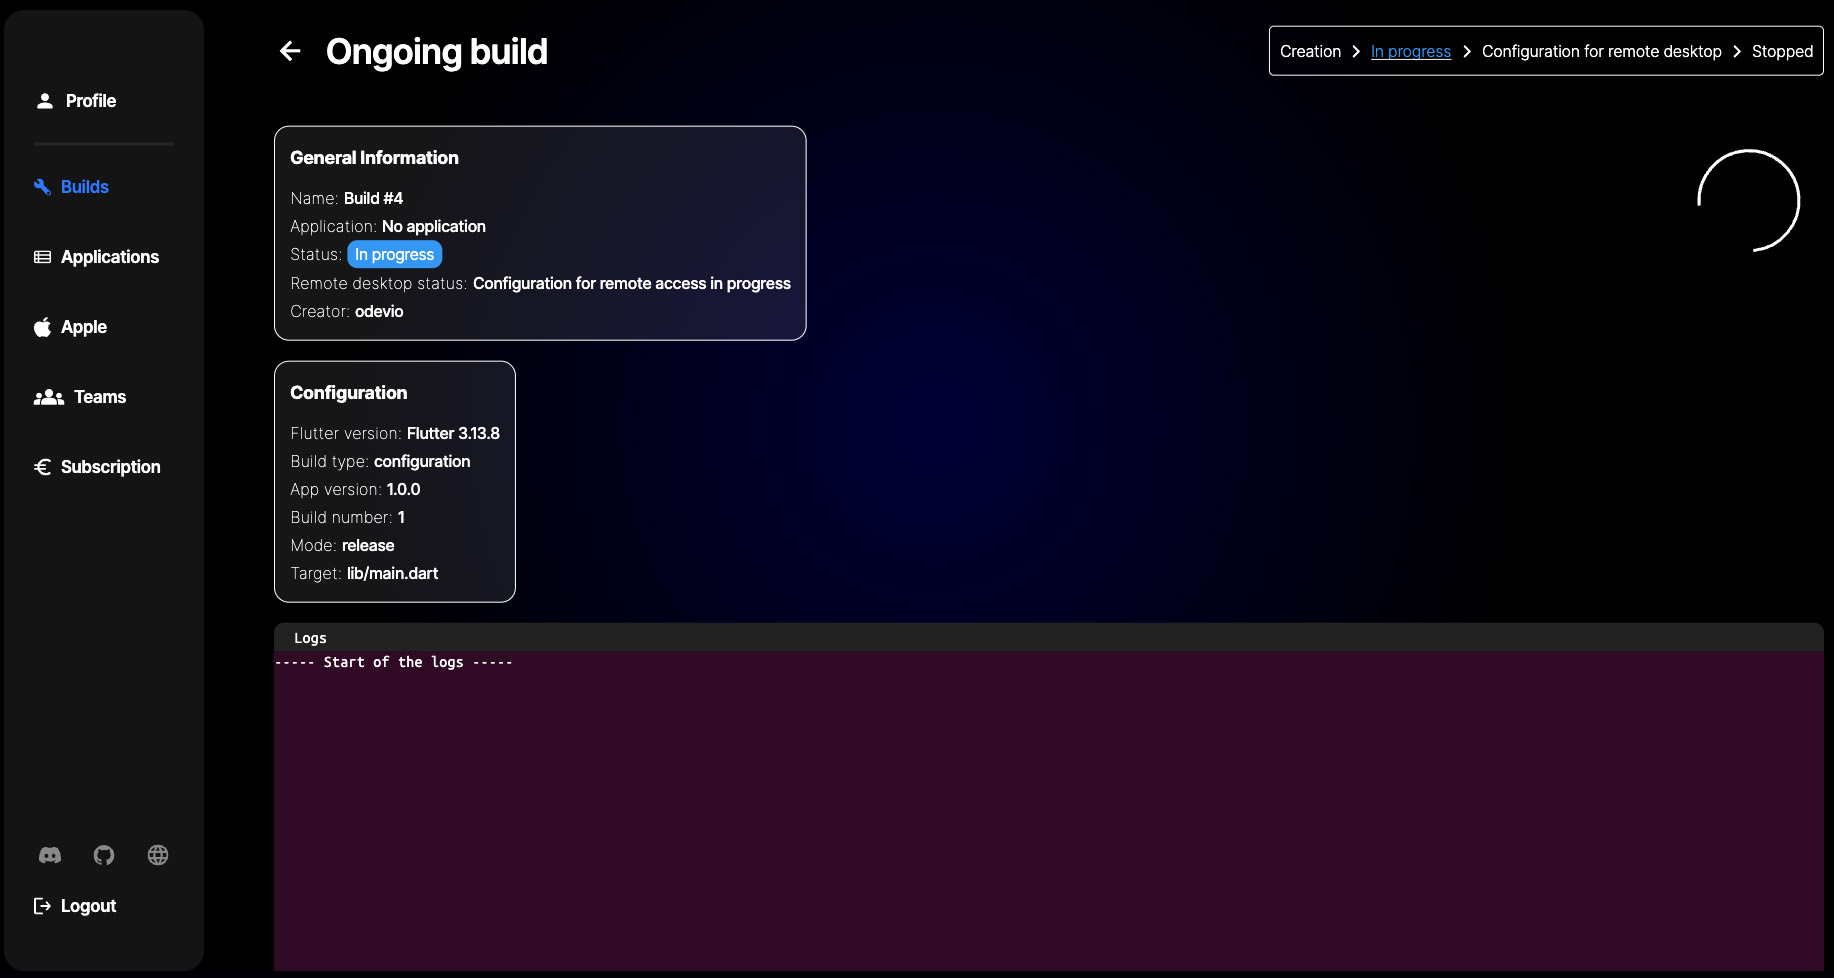
Once it is done, you will receive all the credentials of your Mac virtual machine.
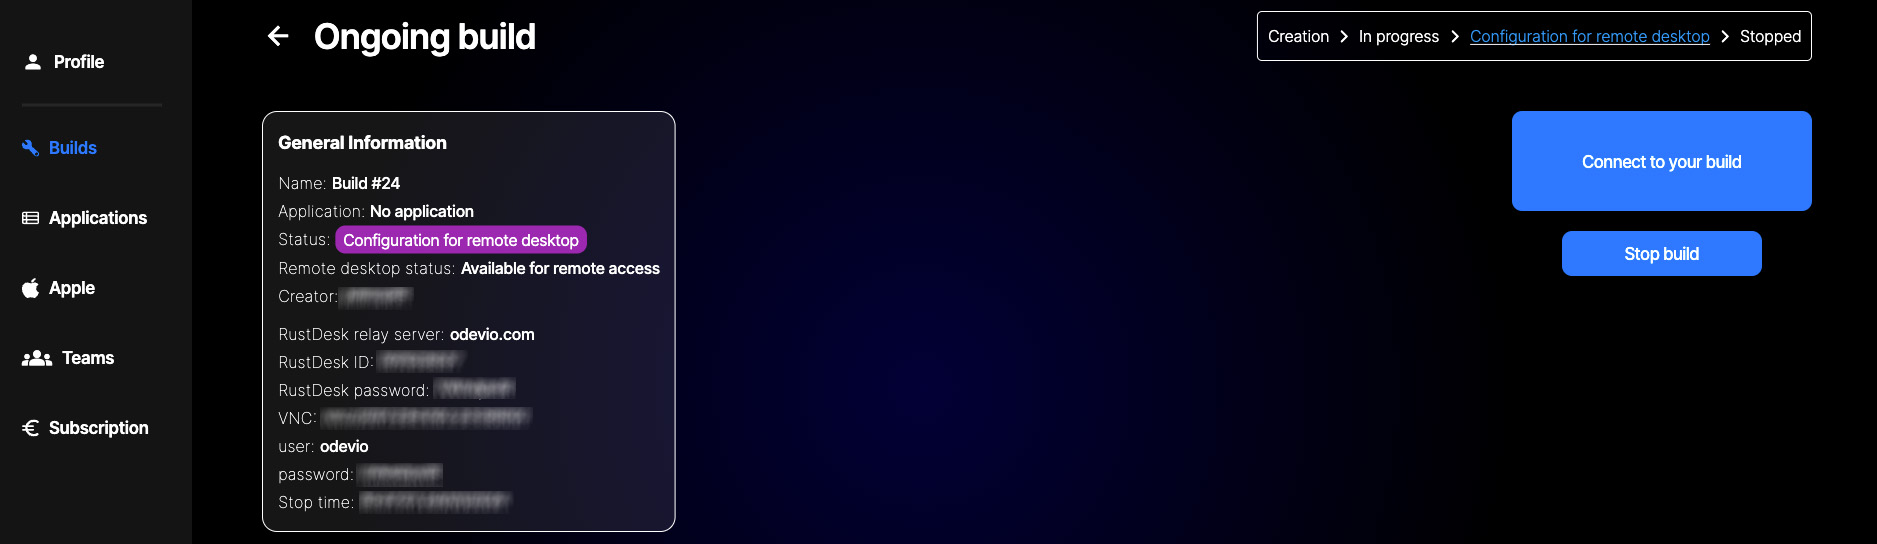
Let’s hop on to the next chapter of our tutorial to learn how to connect and setup Xcode for your build.
Note
If you have an Apple developer account and App ID(s), check out our tutorial on how to link your account and how to create an app ID using Odevio.
Tip
If the build fails you can easily access the logs of your build in real time.