Reference Guide
This guide references all the Odevio fields with their description and how they should be used.
Builds
Settings
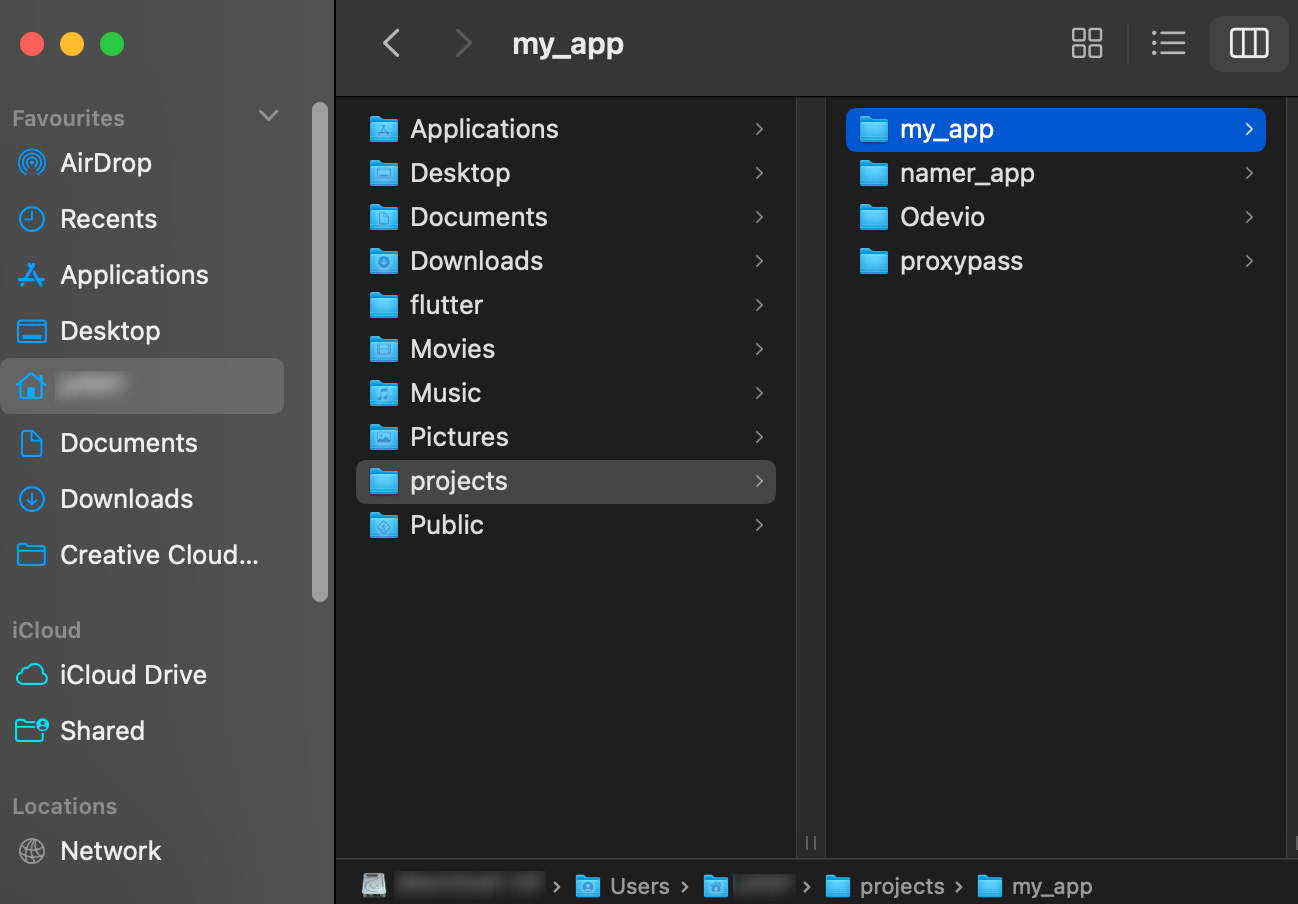
Select a folder:
You have to select the root folder of where your Flutter app is saved.
Application:
You should select the Apple application identifier you wish to build upon. If you do not have any app IDs yet, refer to this tutorial on how to add one.
Build type:
Select the type of build you wish to launch for your application.
Configuration: launch an Odevio-Remote to allow you to configure your project on XCode. This type of build allows you to connect to Odevio remote VMs.
Development: builds the app for testing on an iOS simulator.
Ad-hoc: Build an .ipa file for testing on physical devices listed in your developer account. Check this tutorial on how to add an iOS physical device to your account.
Distribution: Build an .ipa file that can be distributed on any device.
Validation: Build an .ipa file and validates that it can be released on the App Store.
Publication: Build an .ipa file and publish it on the App Store. Once this build succeeds you have to go on the App Store to complete information and screenshots related to your new application version.
Advanced Settings
Flutter:
Flutter version for your build (example “3.16.0”). It is the version you have installed and that you used for your app. You can check the installed Flutter version with the command: flutter --version
Minimal iOS version:
Minimal iOS version that your application supports (example “15.0”). Flutter supports iOS 11.0 and later.
App version:
Build number to set for this build (the number after ‘+’ in the version in pubspec.yaml). If not set, the build number in pubspec.yaml will be used.
Mode:
Mode to build the app in. Defaults to release. There are three different options:
Debug is used during your development phase.
Profile mode when you are analyzing performance.
Release when you are ready to release your application.
For more information, you can check out Flutter’s official documentation
Target:
The main entre-point file of the application. Defaults to lib/main.dart.
Flavor:
Custom app Flavor enables you to create distinct environments within a Flutter app. For example, it is use to manage different versions (free and paid) with a unique code.
Tunnel port:
Start a reverse SSH tunnel when the build is started, forwarding to this sport. Note: This only applies to configuration builds.
Tunnel host:
If –tunnel-port is specified, this is the host to forward to (defaults to localhost).
Tunnel remote port:
If –tunnel-port is specified, this is the port on the VM (defaults to the same port, except for 22 and 5900).
Applications
Name:
Your app identifier name, you can simply use you app’s name.
Bundle ID:
The bundle ID for your app on Apple. It is a unique identifier. Apple recommends using the reverse domain name notation (e.g.: com.company.appname).
Developer Account:
Select your Apple Developer Account.
Apple
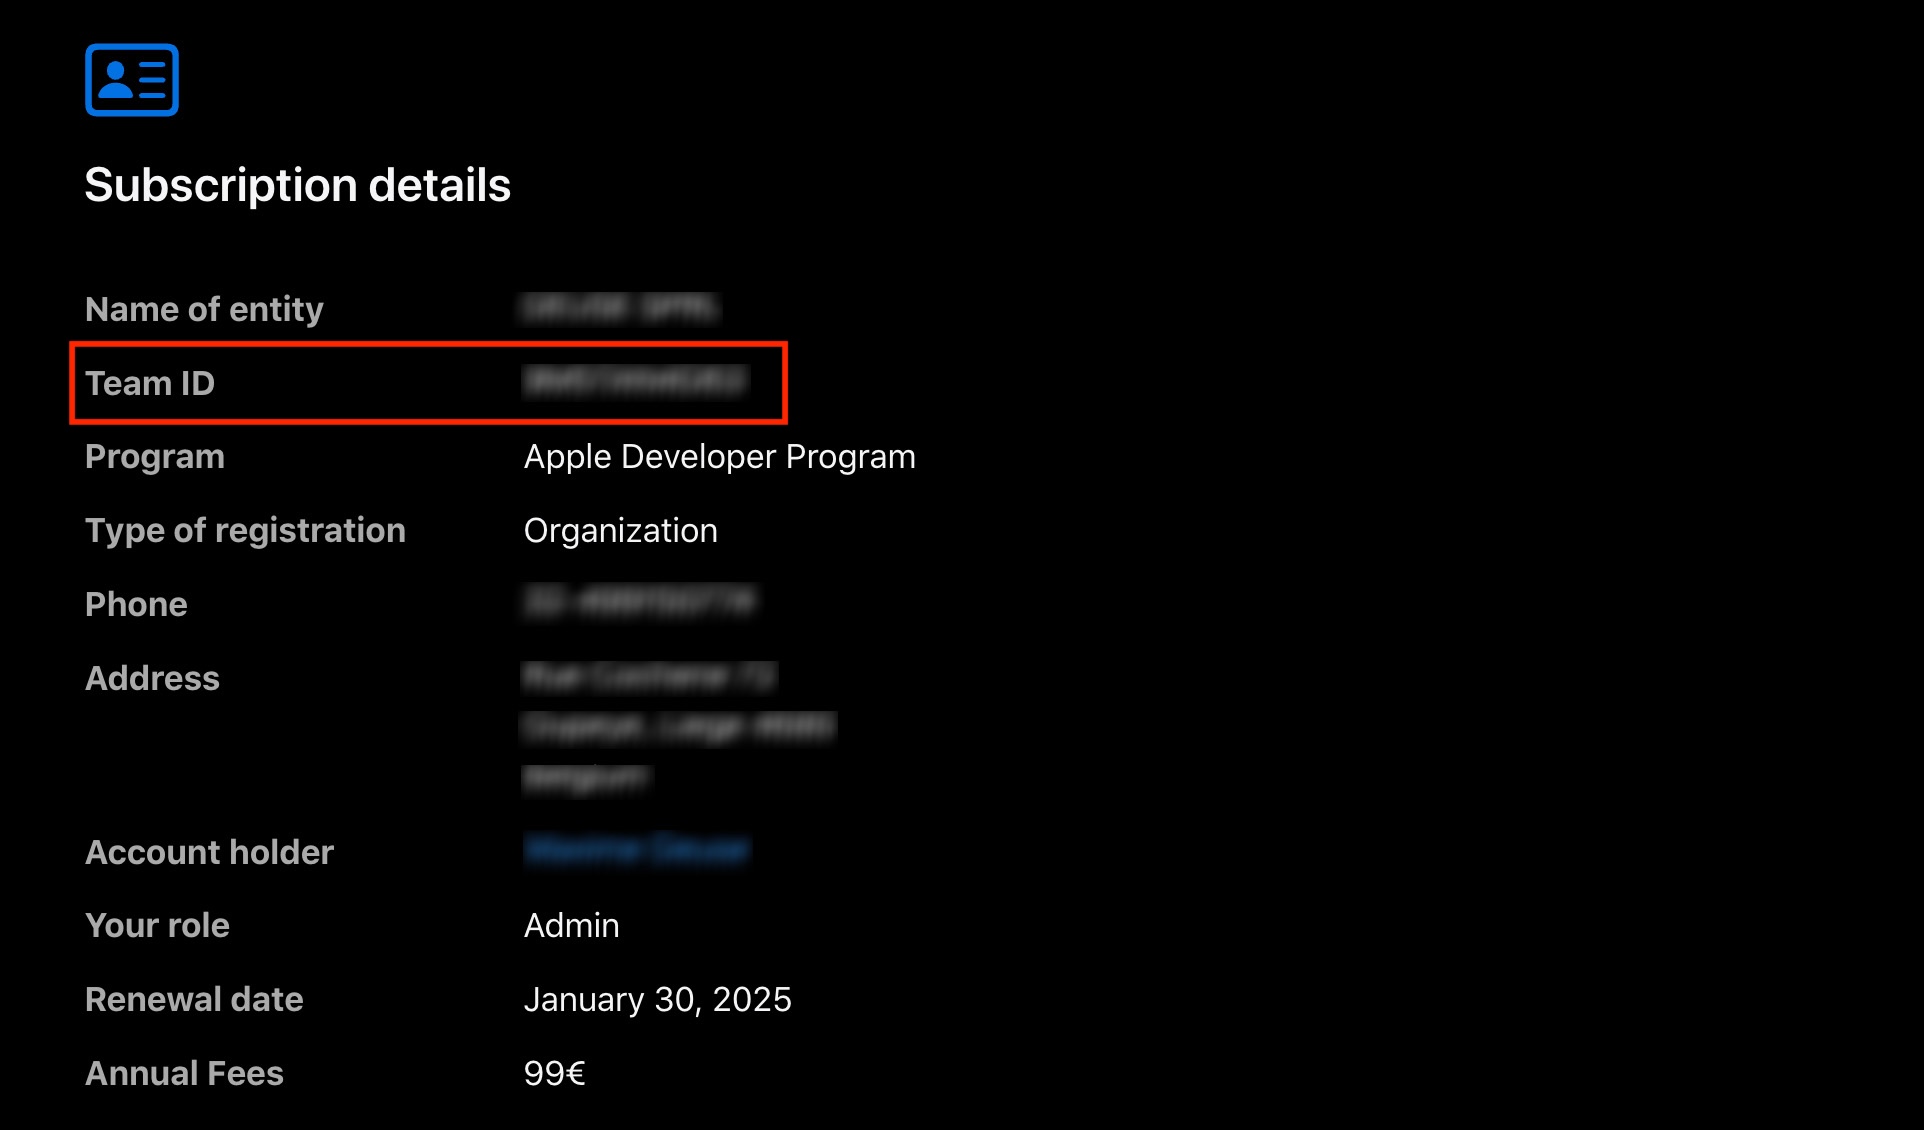
Team ID:
Required ID of your developer account on Apple. It is 10-character string generated by Apple that’s assigned to your team.
Name:
A user friendly name for your Apple developer account.
Key ID:
Required API key “Key ID” on App Store Connect in the Users and Access menu and in the keys tab:
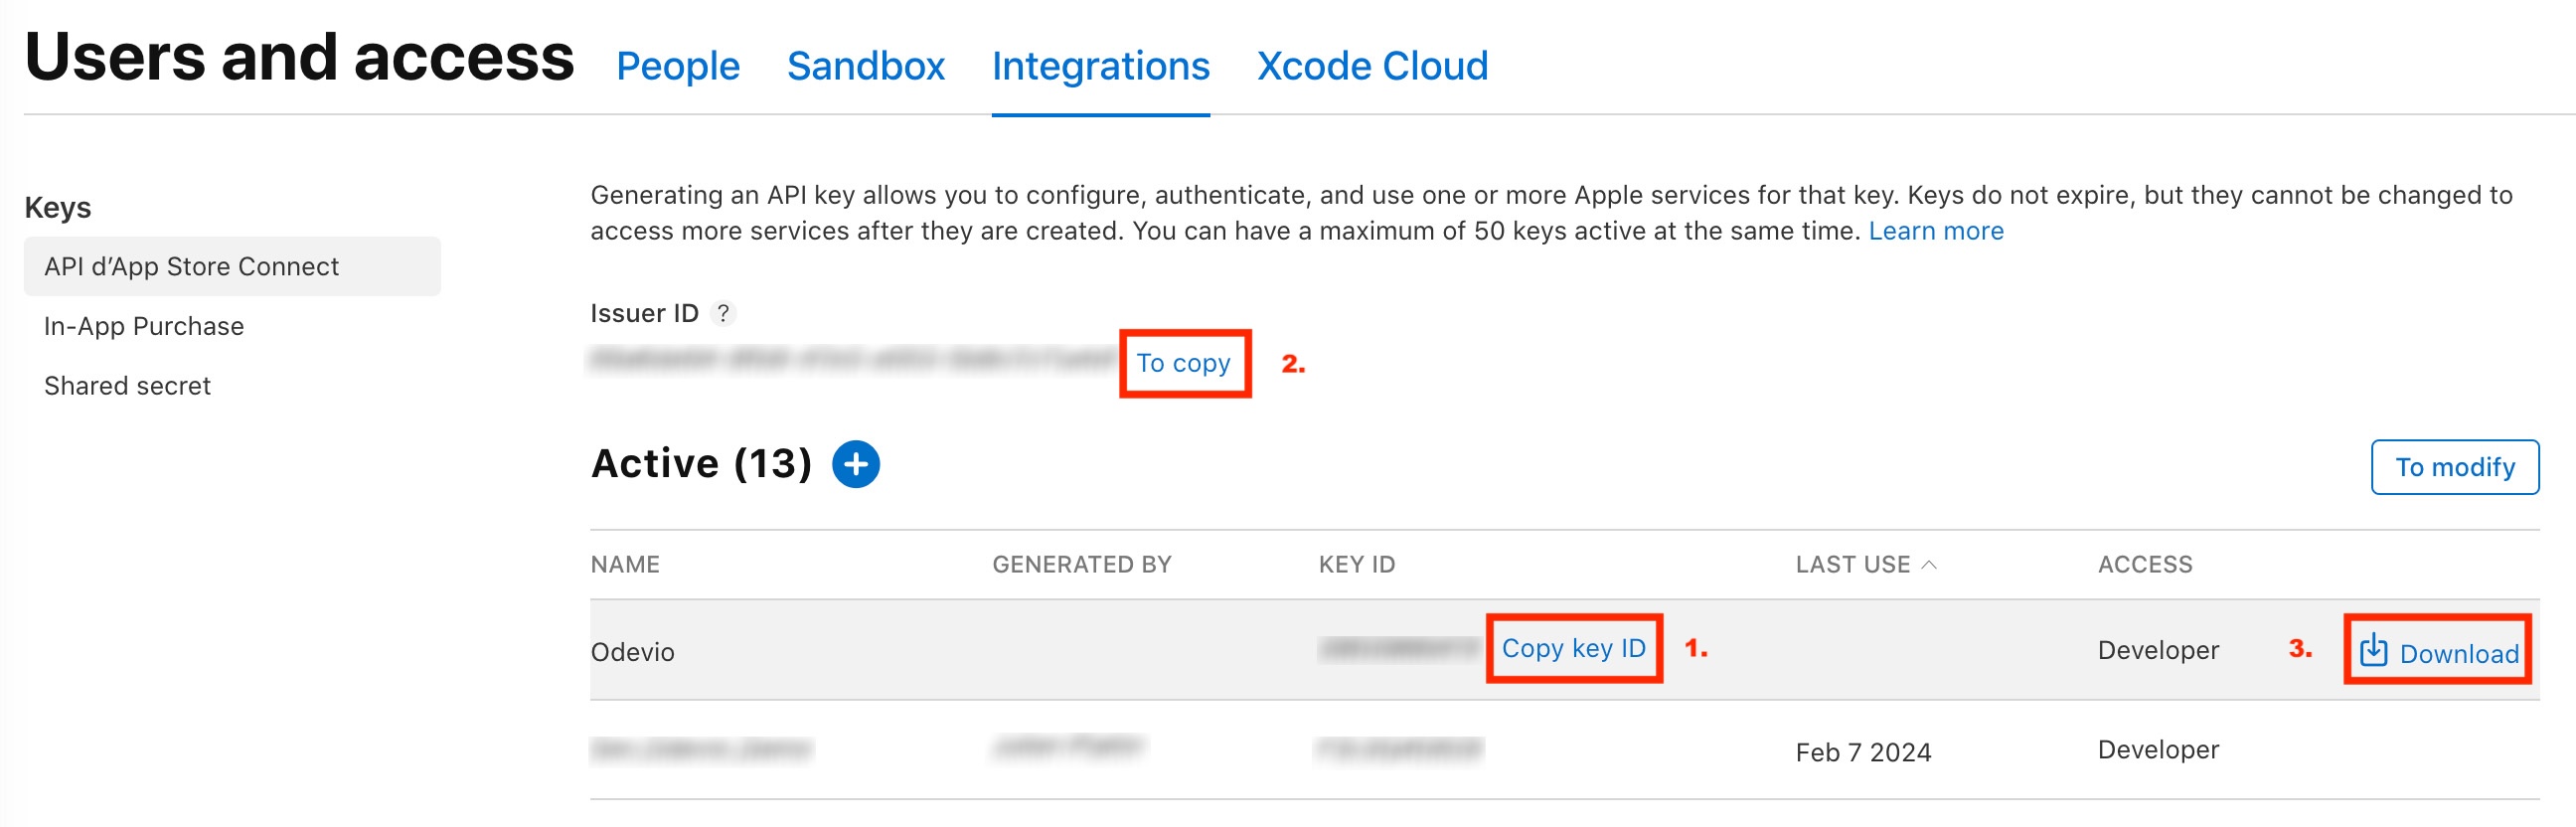
Issuer ID:
Required Issuer ID on App Store Connect. See above screenshot.
Private key path:
Required Path to the private key downloaded from App Store Connect.
Select the file where you stored your key. The path should look like this:
/Users/USERNAME/Downloads/AuthKey_KeyID.p8
Teams
In the Teams menu you can have an overview of all the teams you are part of.
You can create a new team, you just have to name it.
By clicking on a team, you will see all the details of the team. A list of all the members, all the applications and developer accounts you have access too.
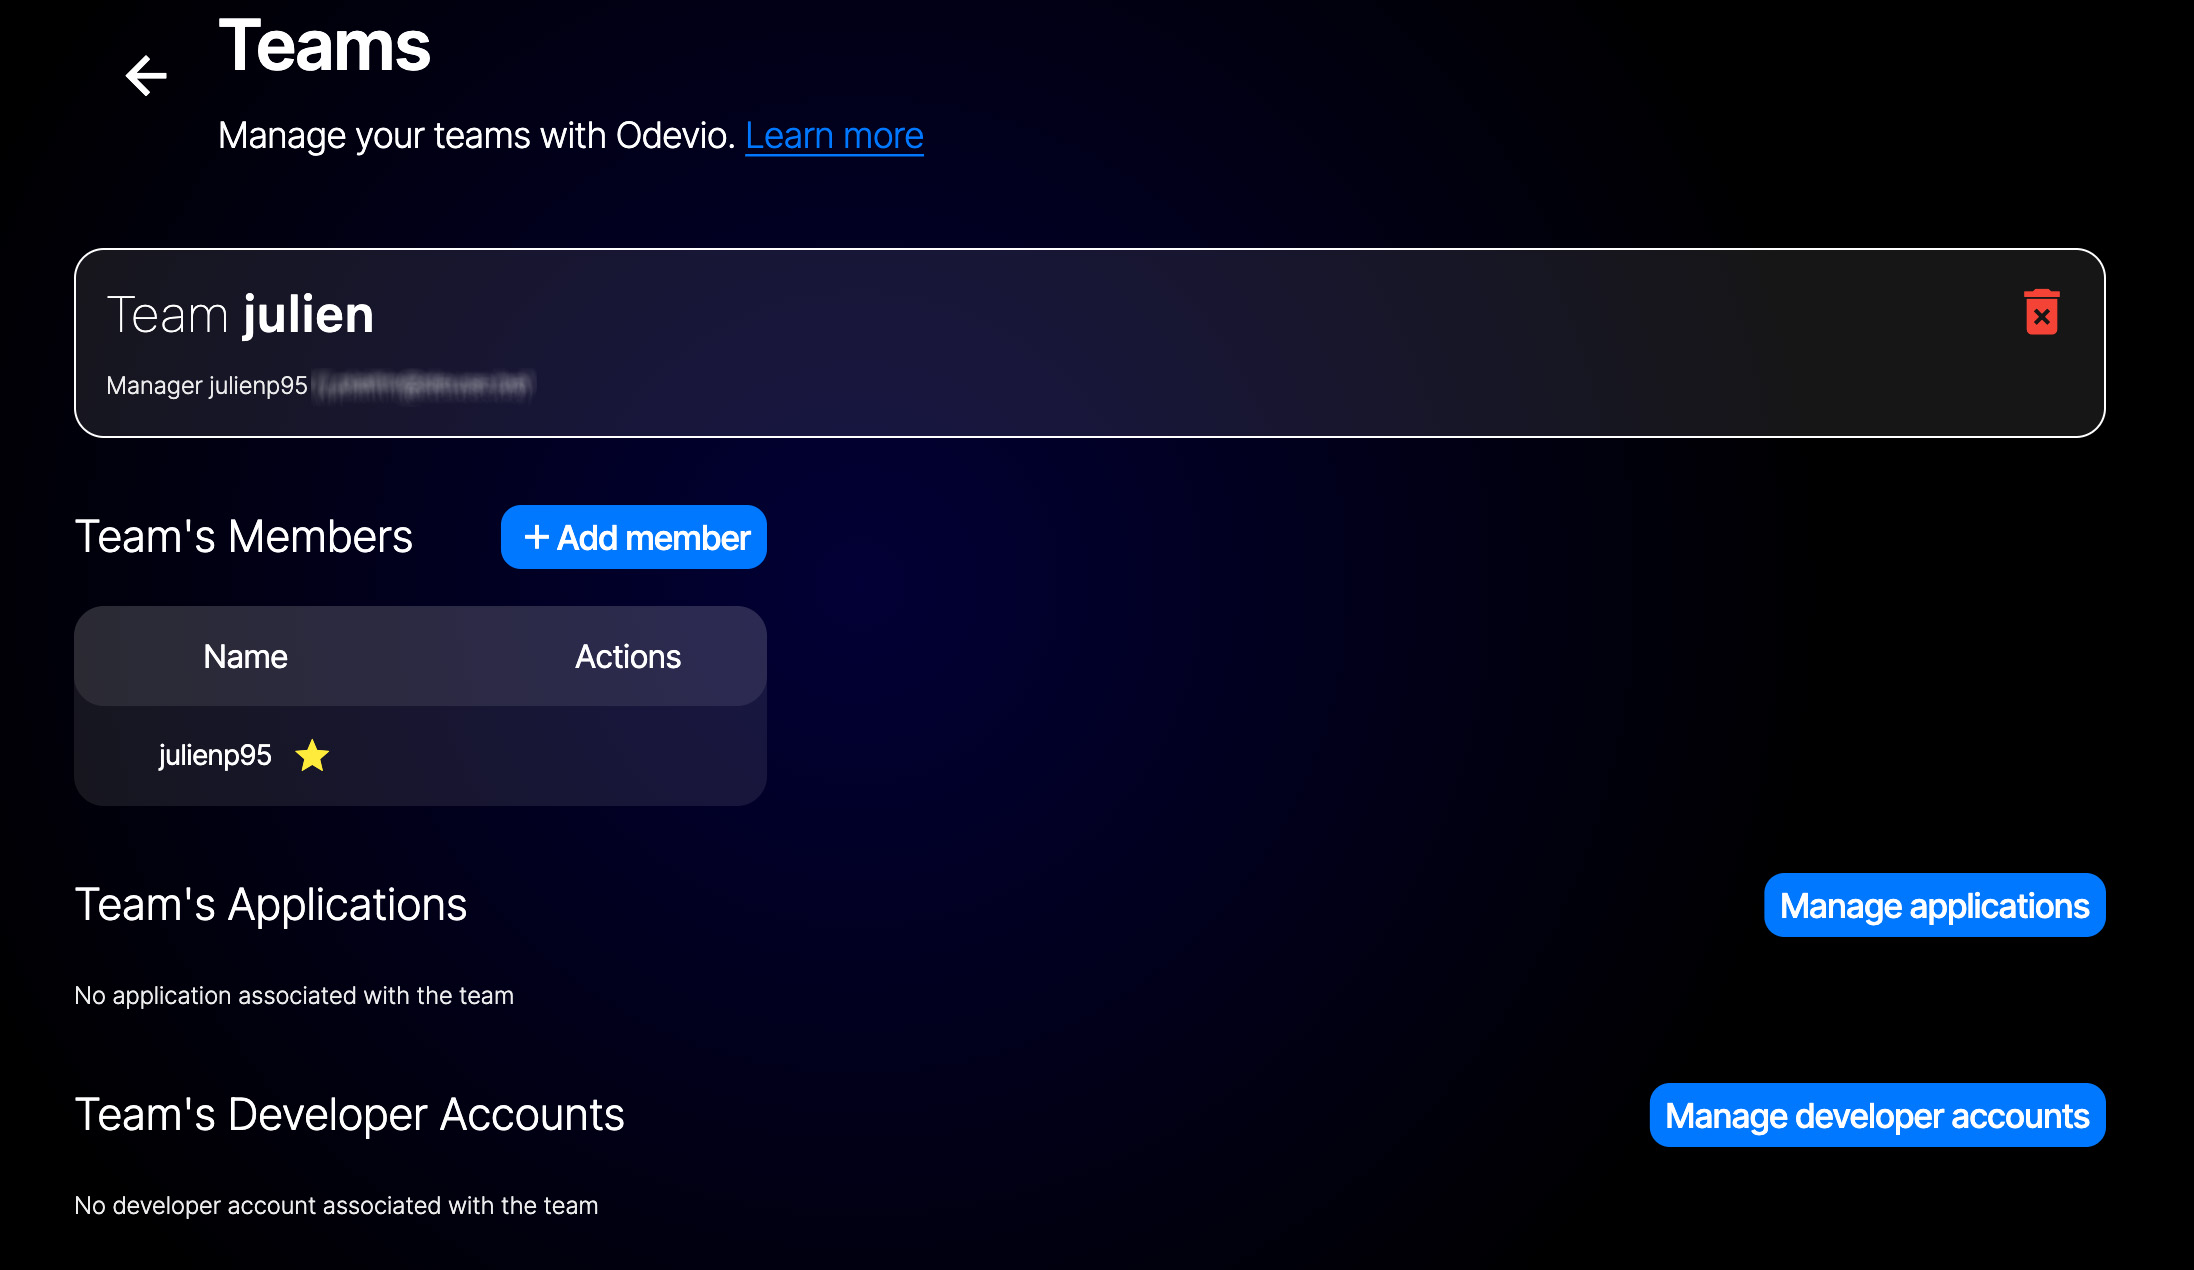
If you are the team’s manager you have addtional rights to add or remove members, applications and developer accounts.
Note
You can add applications and developer accounts that are already linked to your account. Adding a developer account gives access to all the applications that are linked to it to all the team’s members.